Zapier https://zapier.com/ is a cloud-based paid service that enables automation of workflows between different applications. Each flow created to connect applications in Zapier is called “Zap”.
If you are using Facebook Business Manager, you can set some triggers to automatically transfer leads to TeamGram via Zapier. You can test Zapier’s “Facebook Lead Ads’ ‘ application for 14 days free of charge. You must have a Zapier’s paid subscription after the end of the trial period.
Zapier-TeamGram integration; It can be done via TeamGram or Zapier account.
Zapier connection via TeamGram account
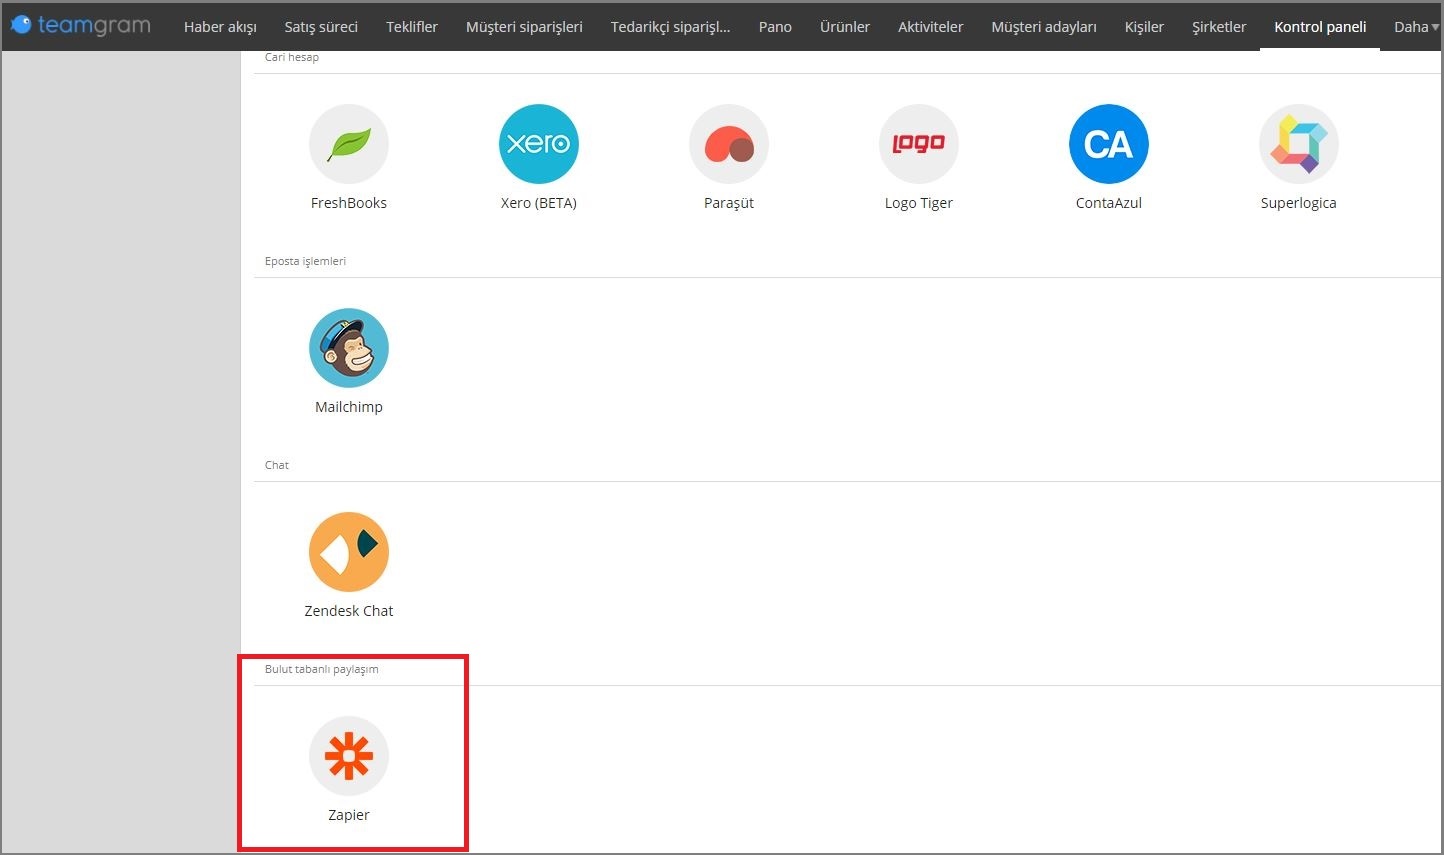
TeamGram> Control Panel> Integrations> Zapier page.
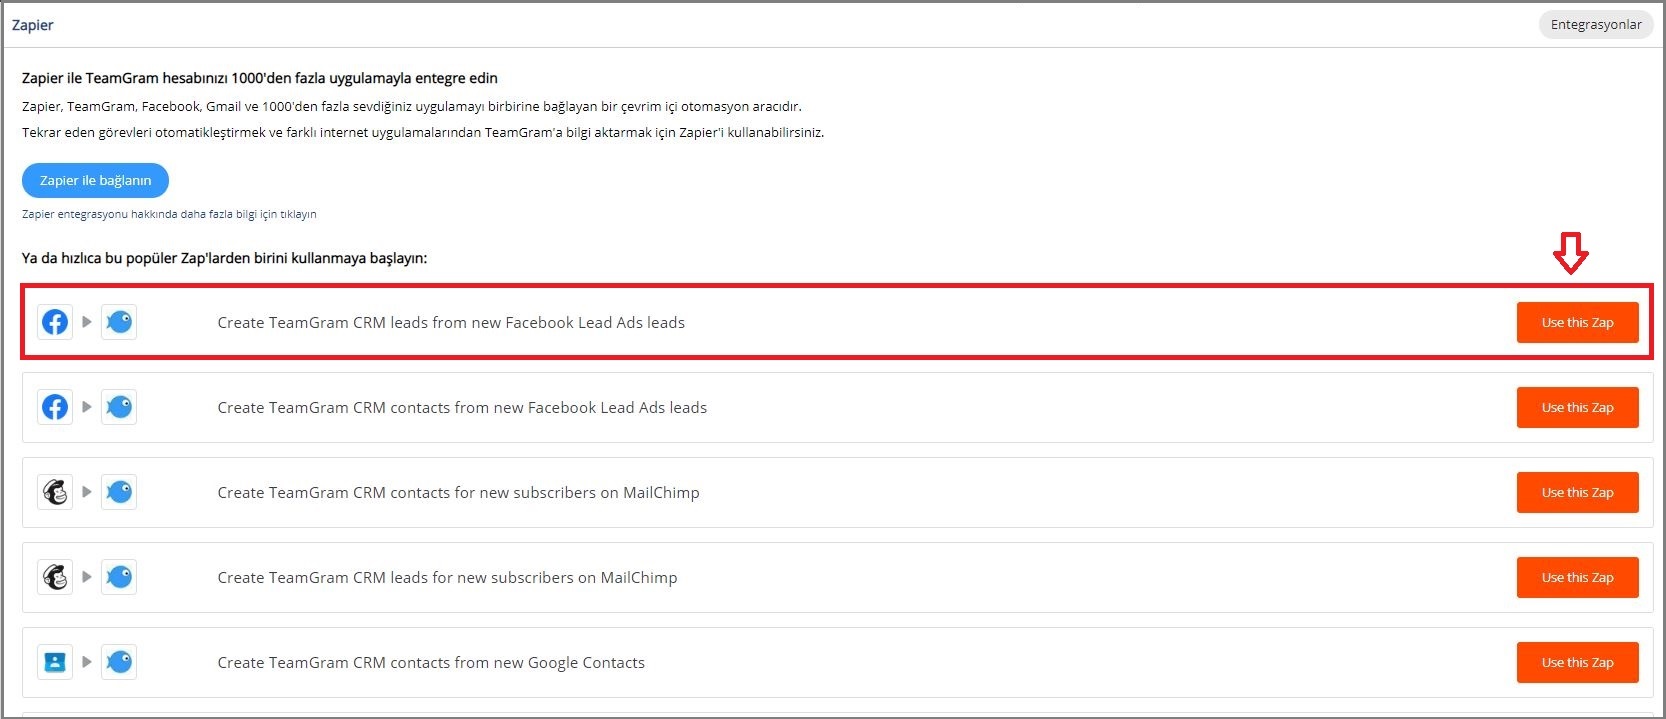
“Create TeamGram CRM leads from new Facebook Lead Ads leads” > “use this ZAP” click on it to log in to your Zapier account, Connect with your Facebook account and follow the instructions below.
TeamGram connection via Zapier
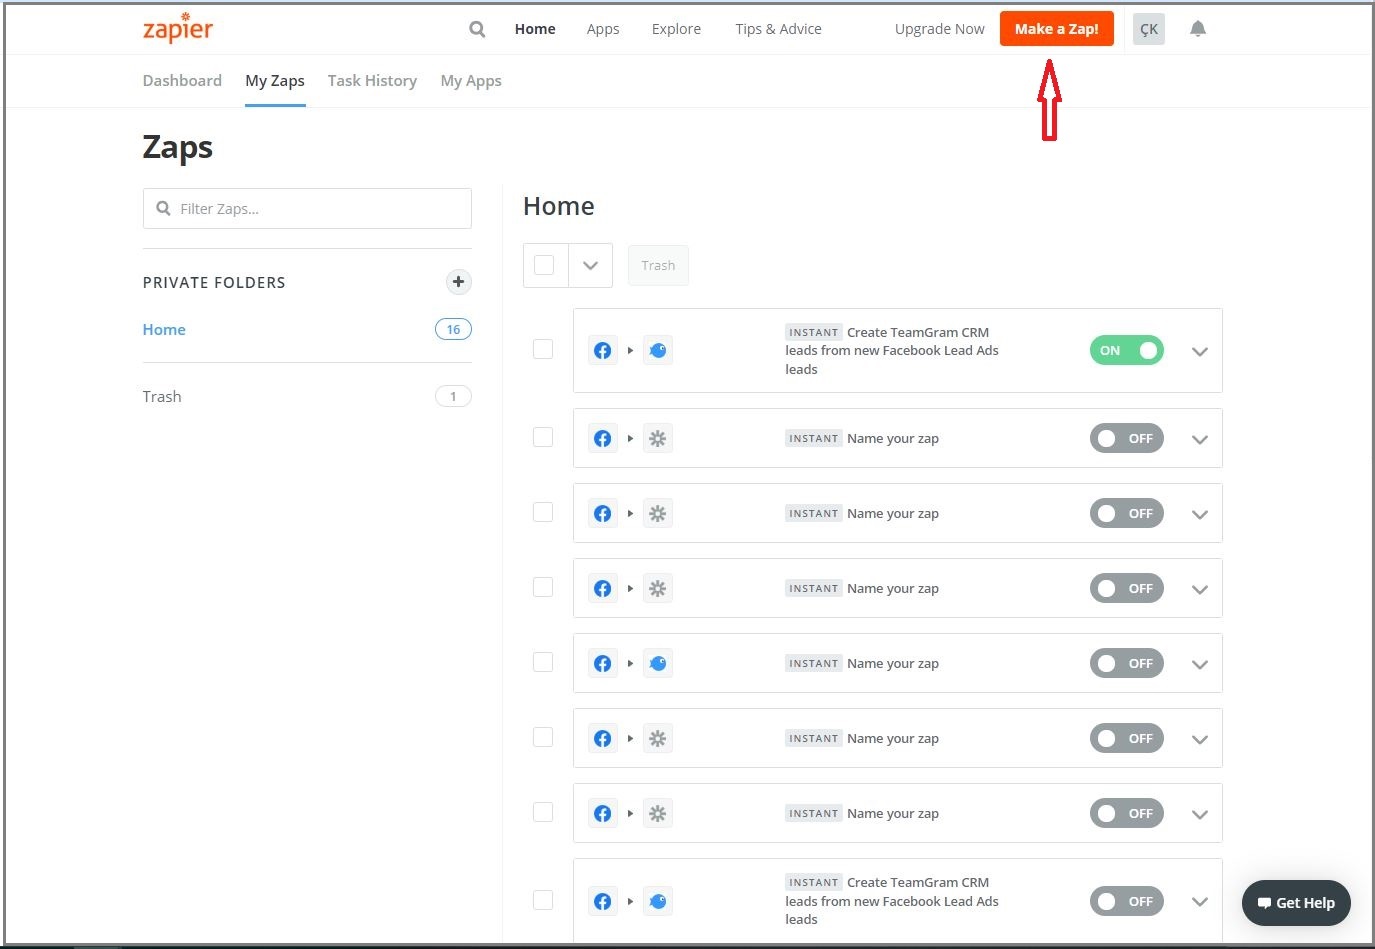
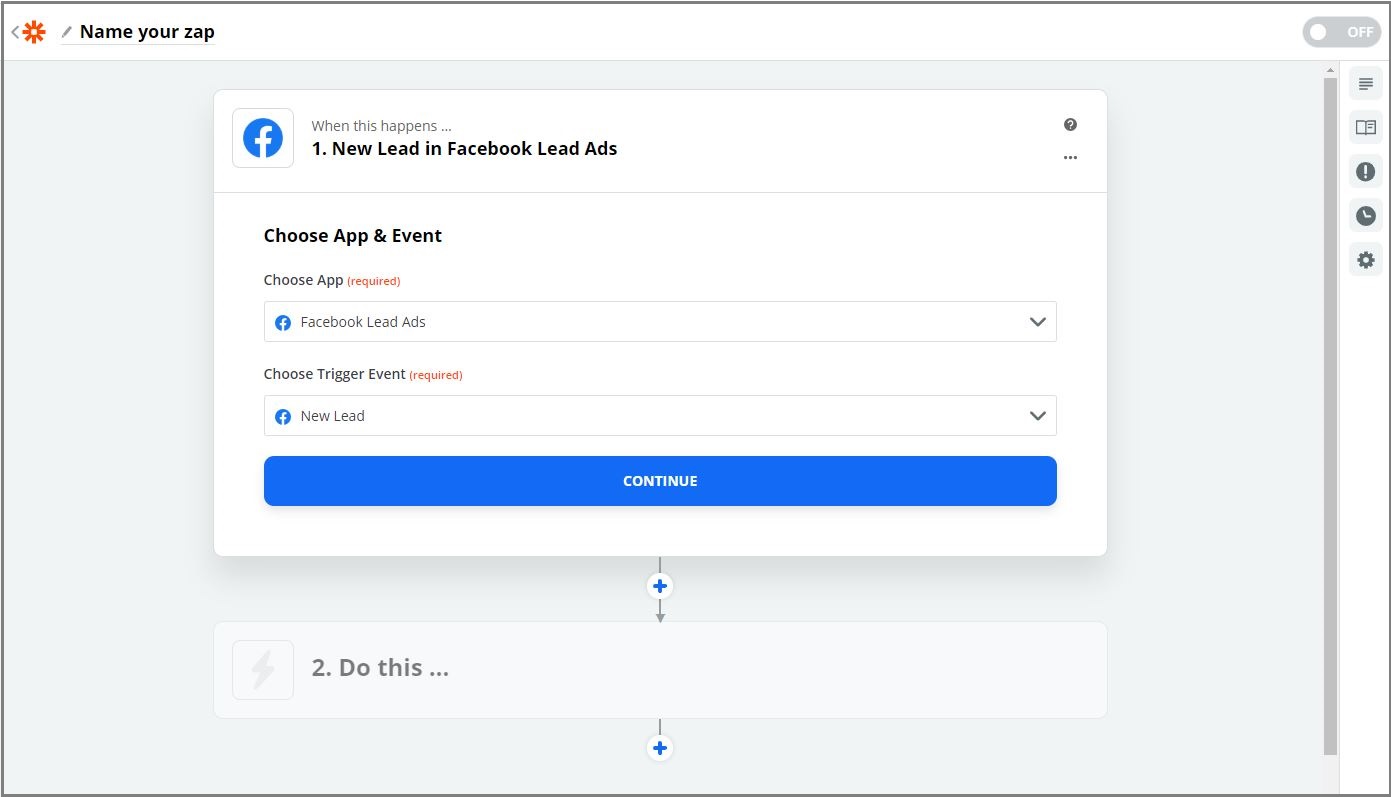
After logging into your Zapier’s account, click on the text “Make a Zap” in the upper right corner.
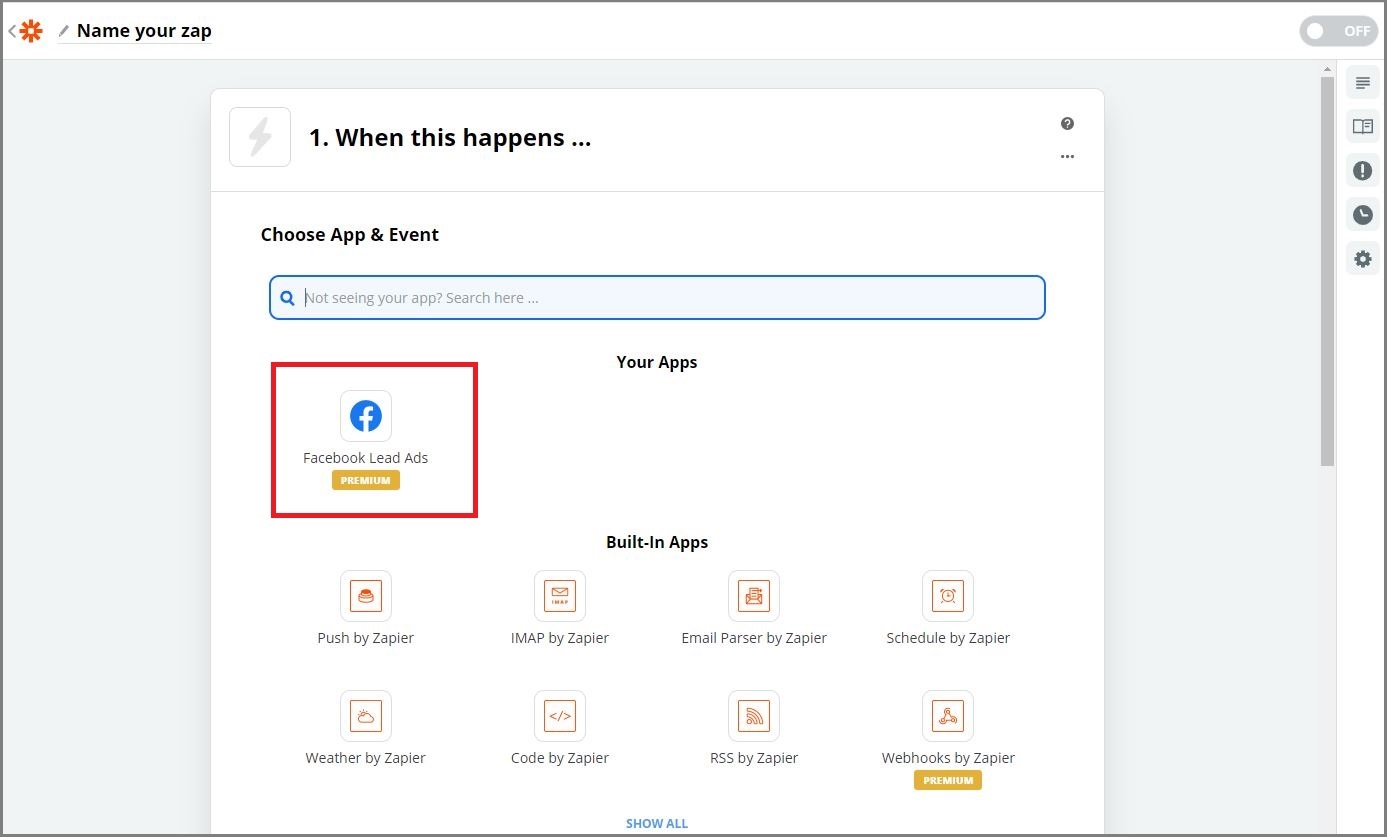
Select “Facebook Ads Lead”
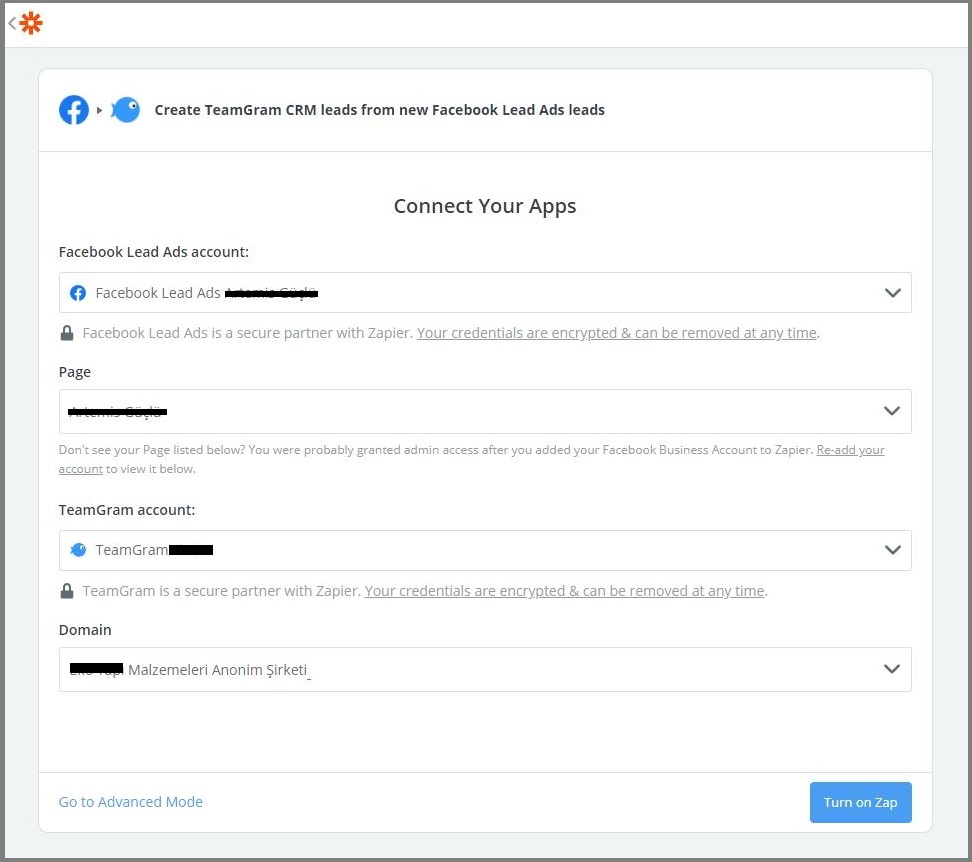
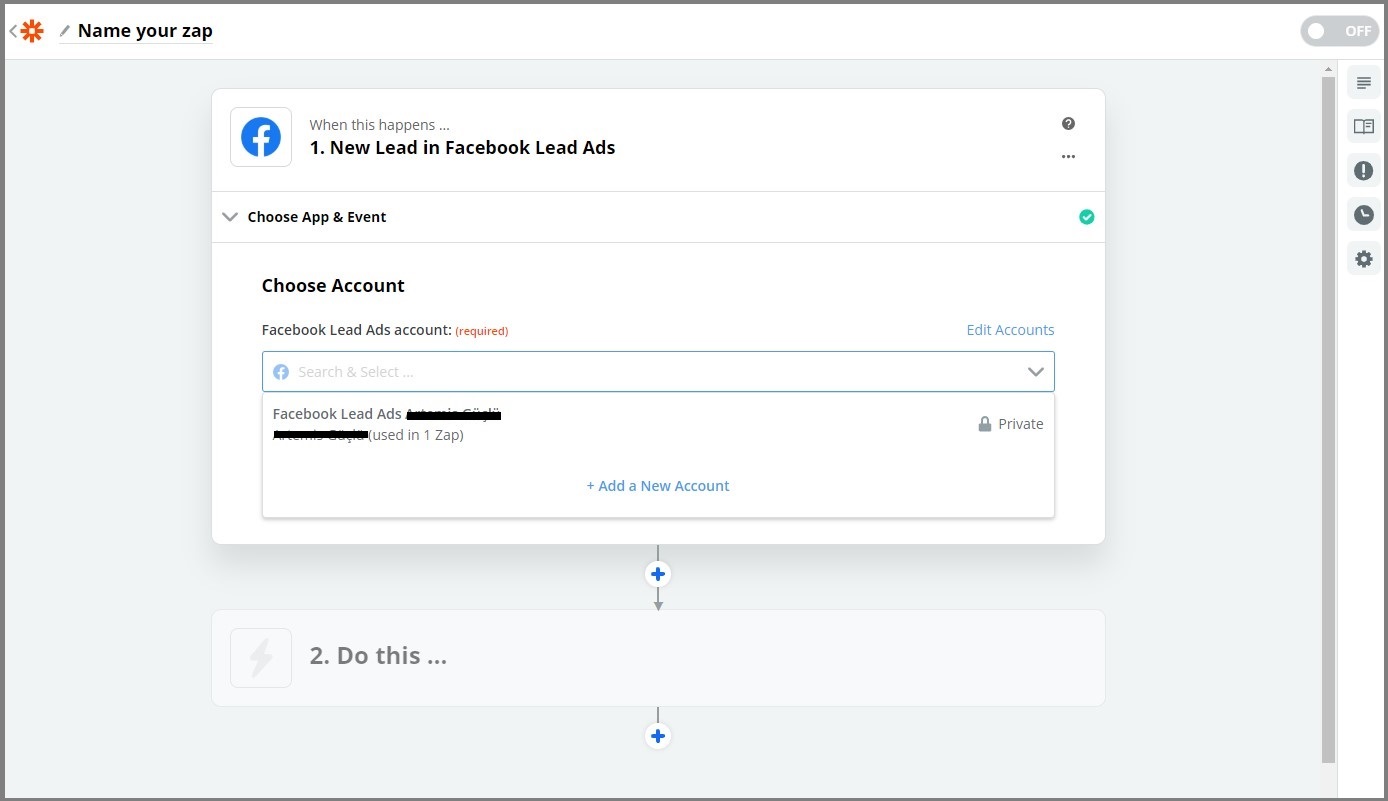
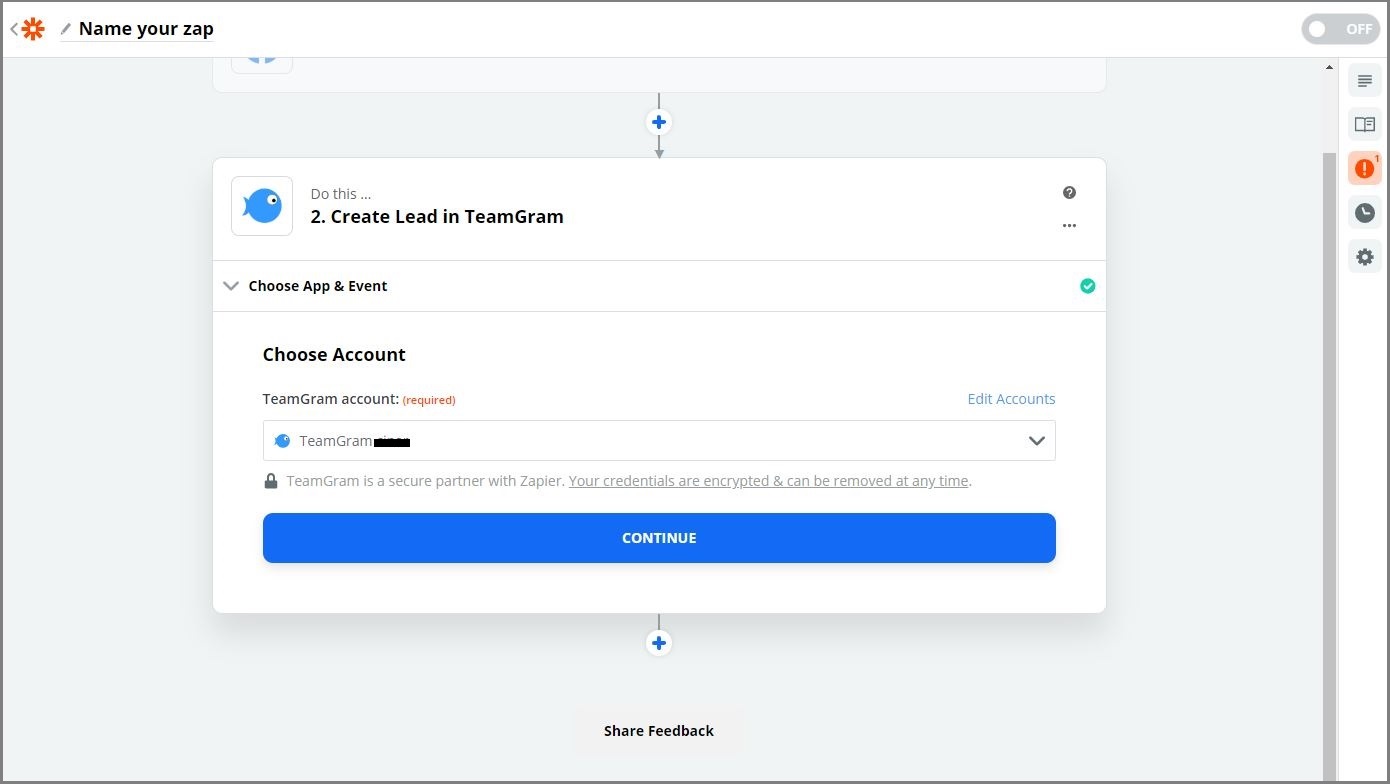
Now, you need to link/select your account. After logging into Facebook and TeamGram accounts, a new window will pop-up asking you to authorize Zapier to connect to the application.
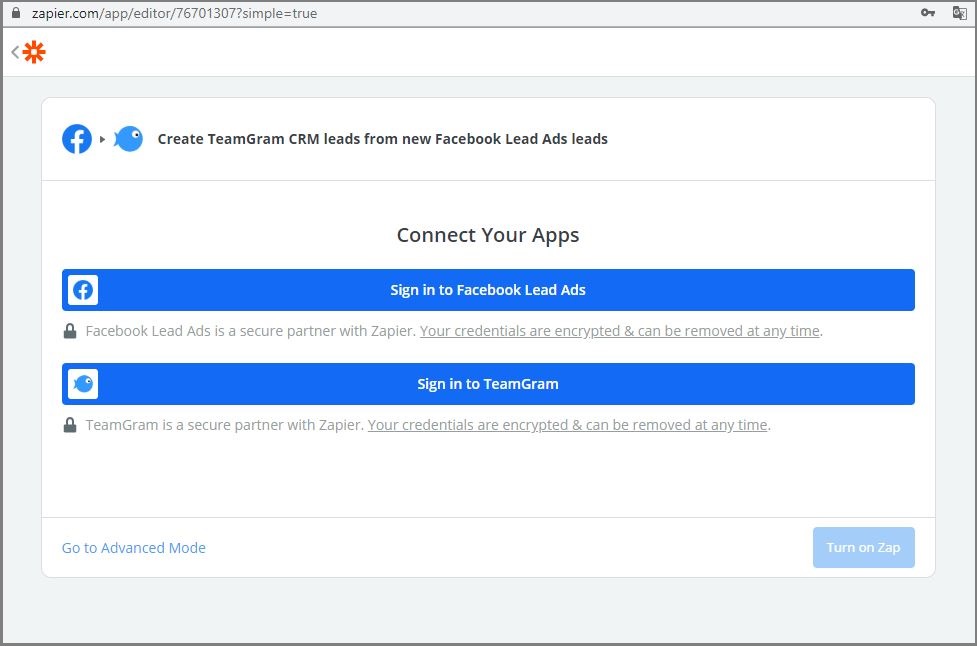
After giving the authorization confirmation, click on the “Continue” button.
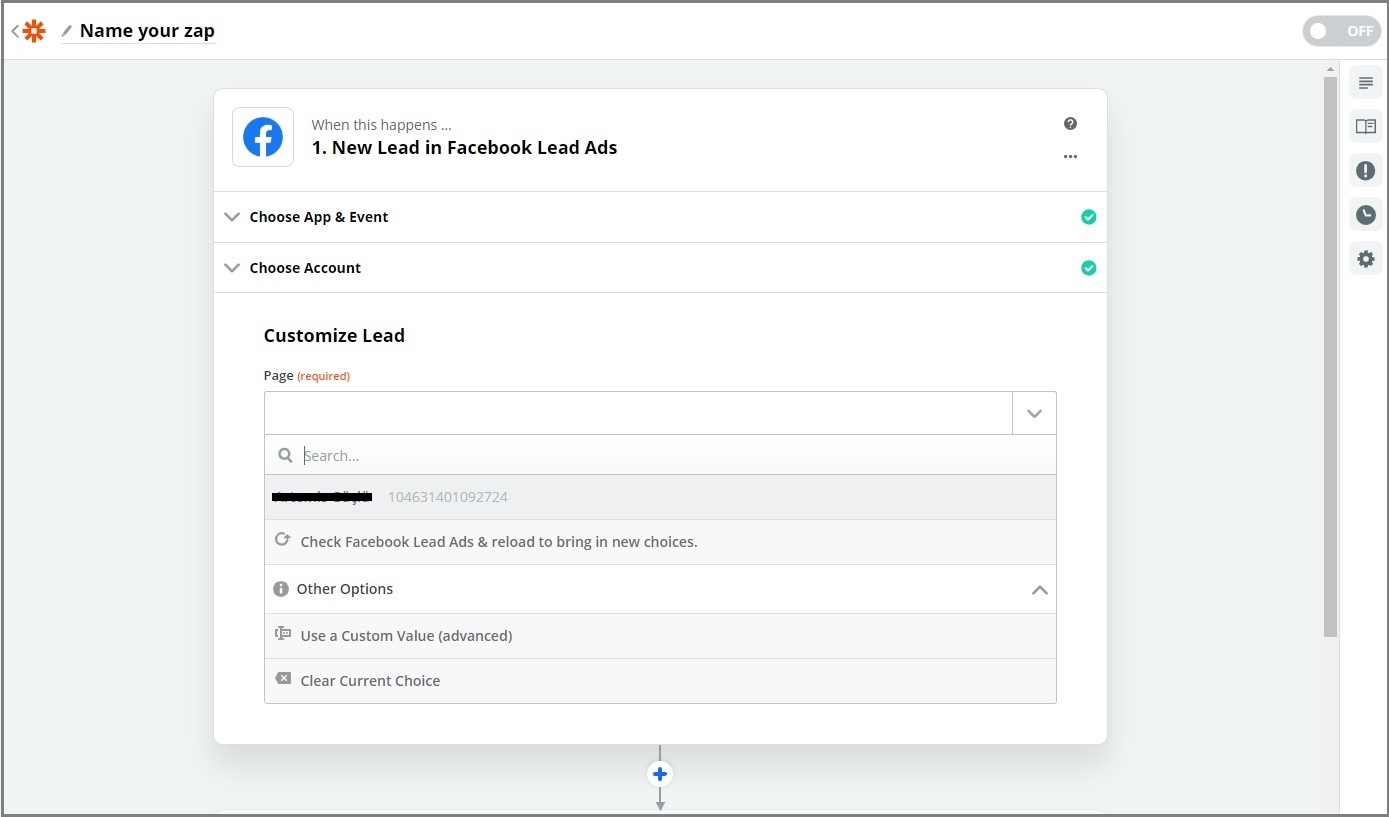
In this page, you need to select your “Facebook page” and the “Form” you want to trigger.
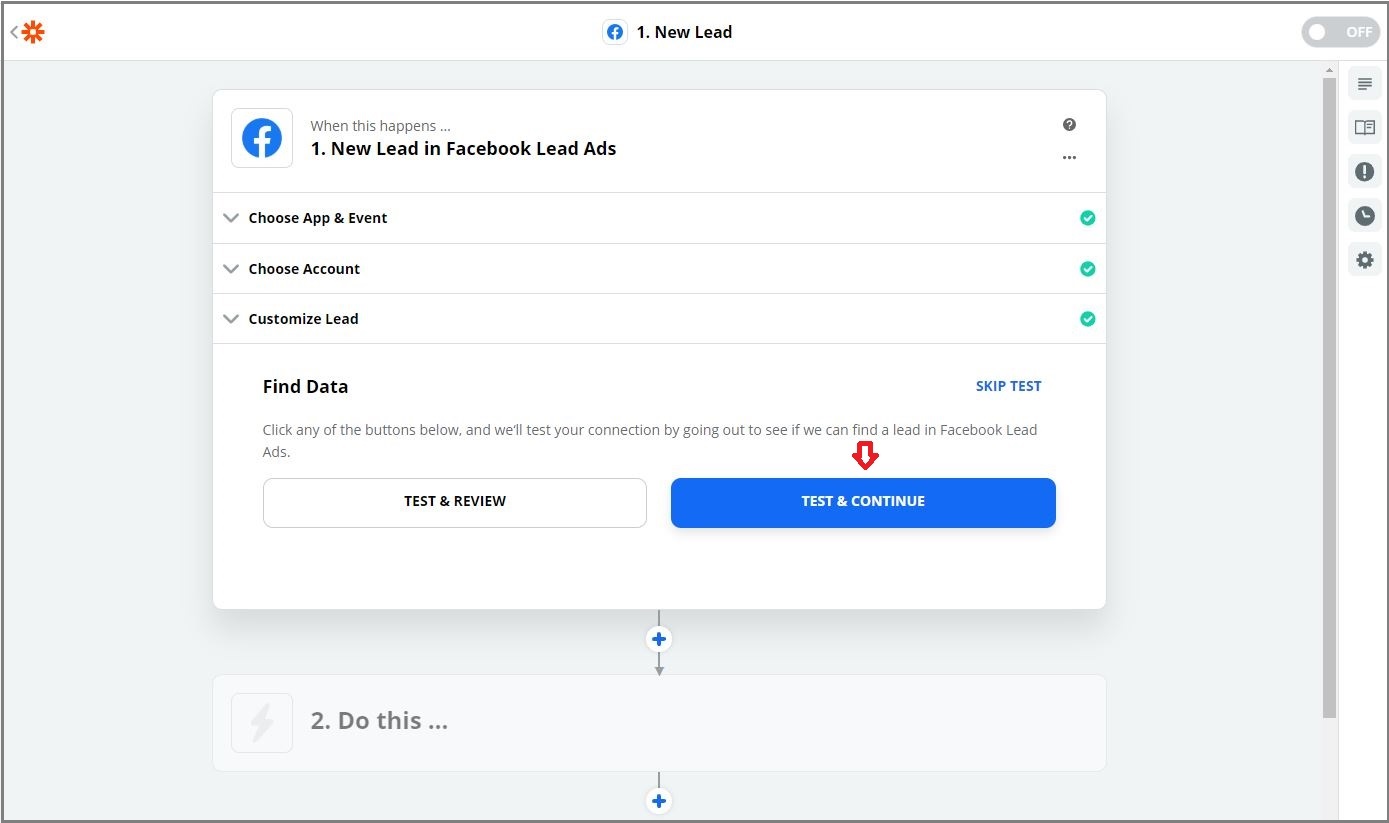
Click on the “Test & Continue” button to make sure the trigger is working.
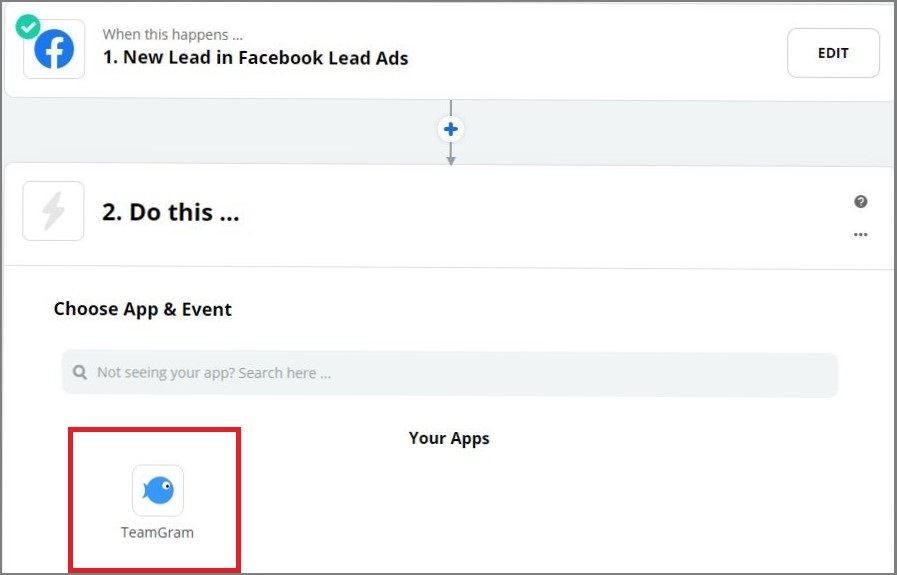
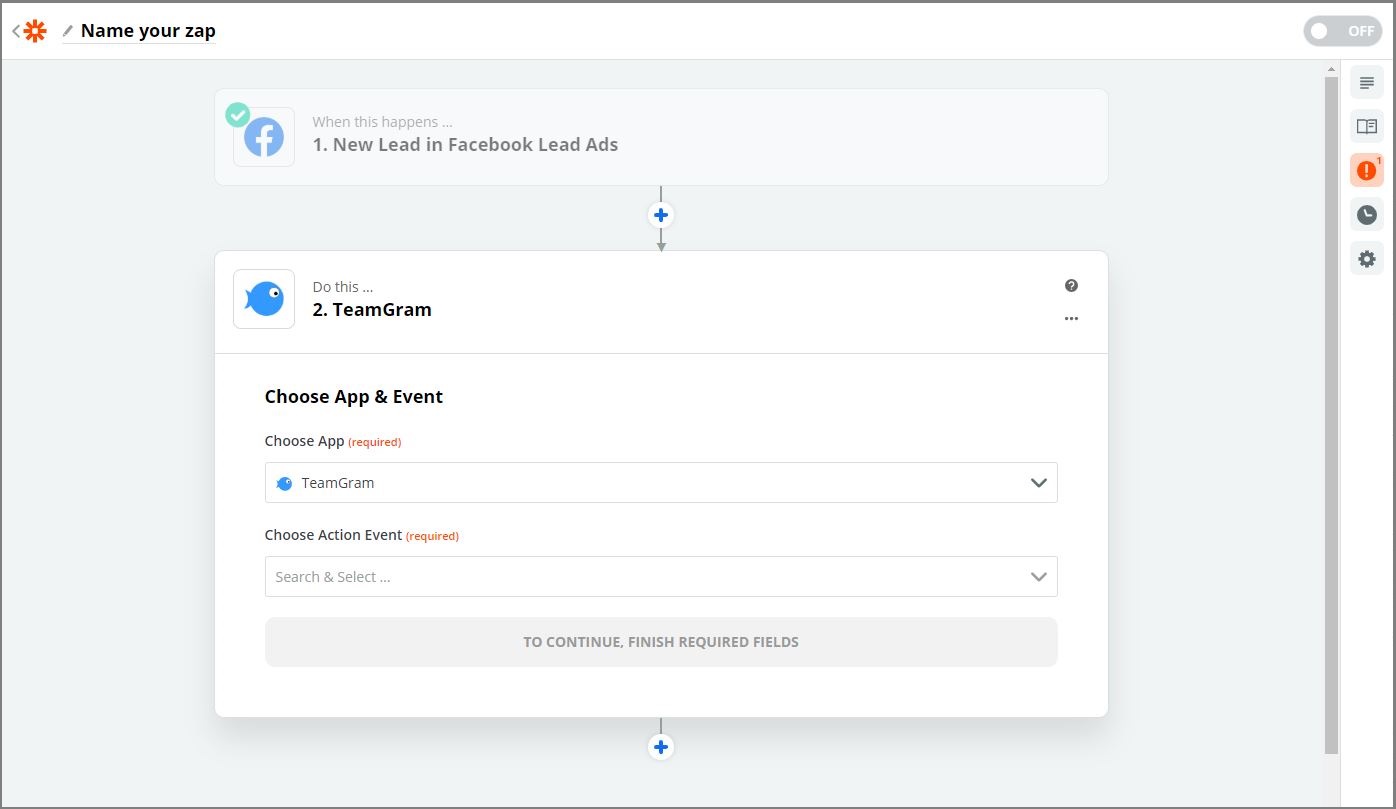
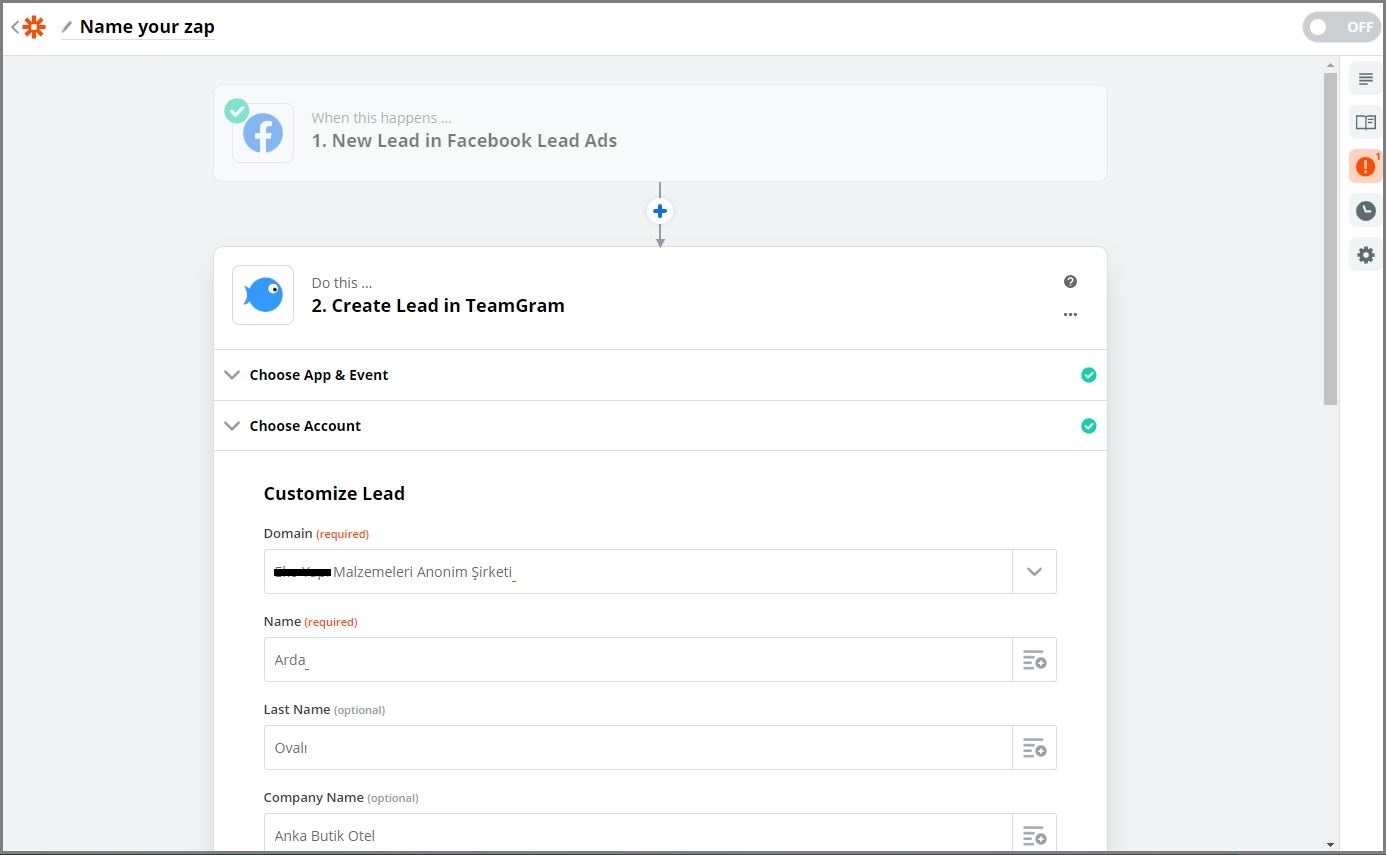
When you are in Step 2, you have to choose the action application first. Type the name of the TeamGram application (Form application name), then click on “TeamGram” logo and follow the instructions.
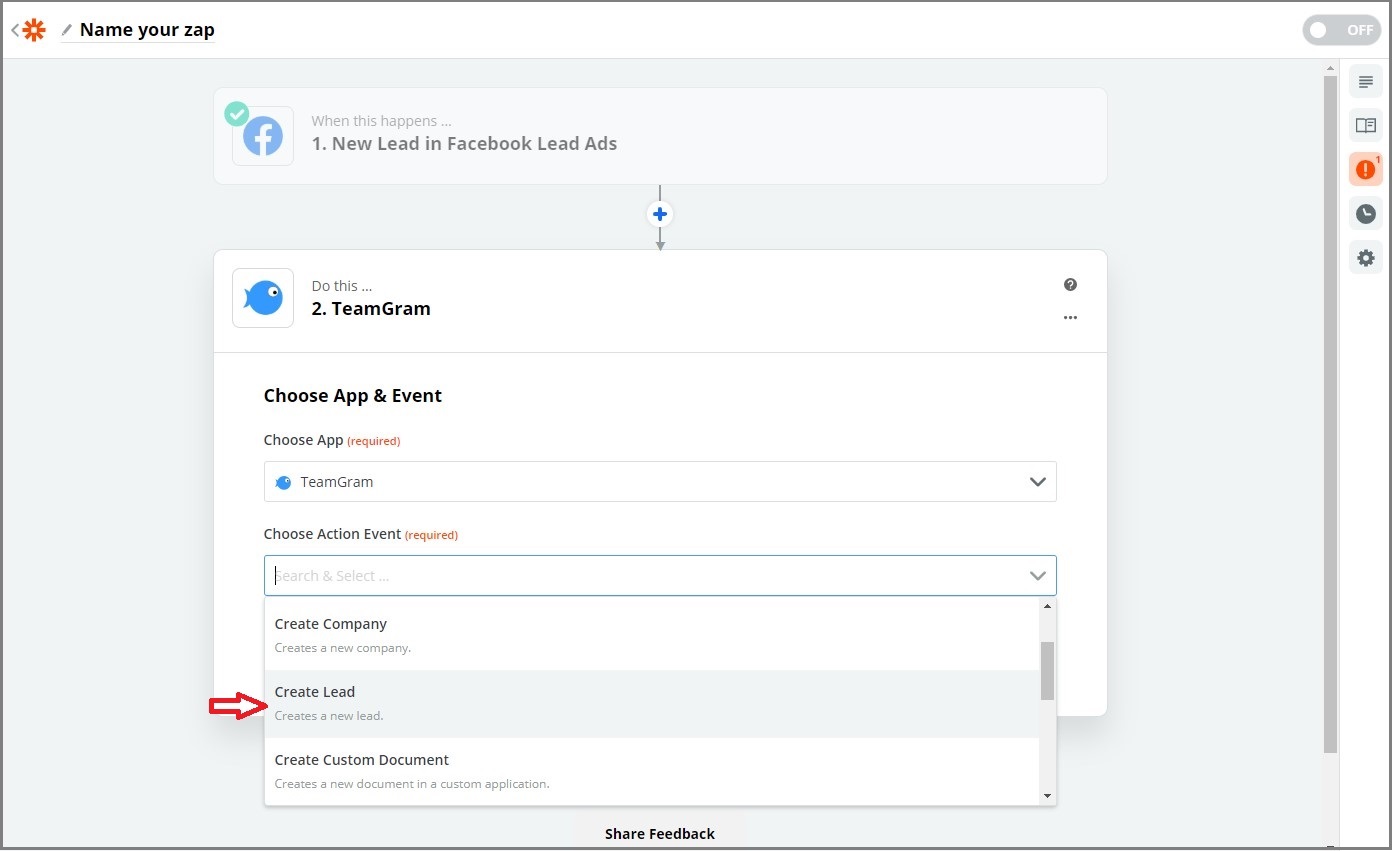

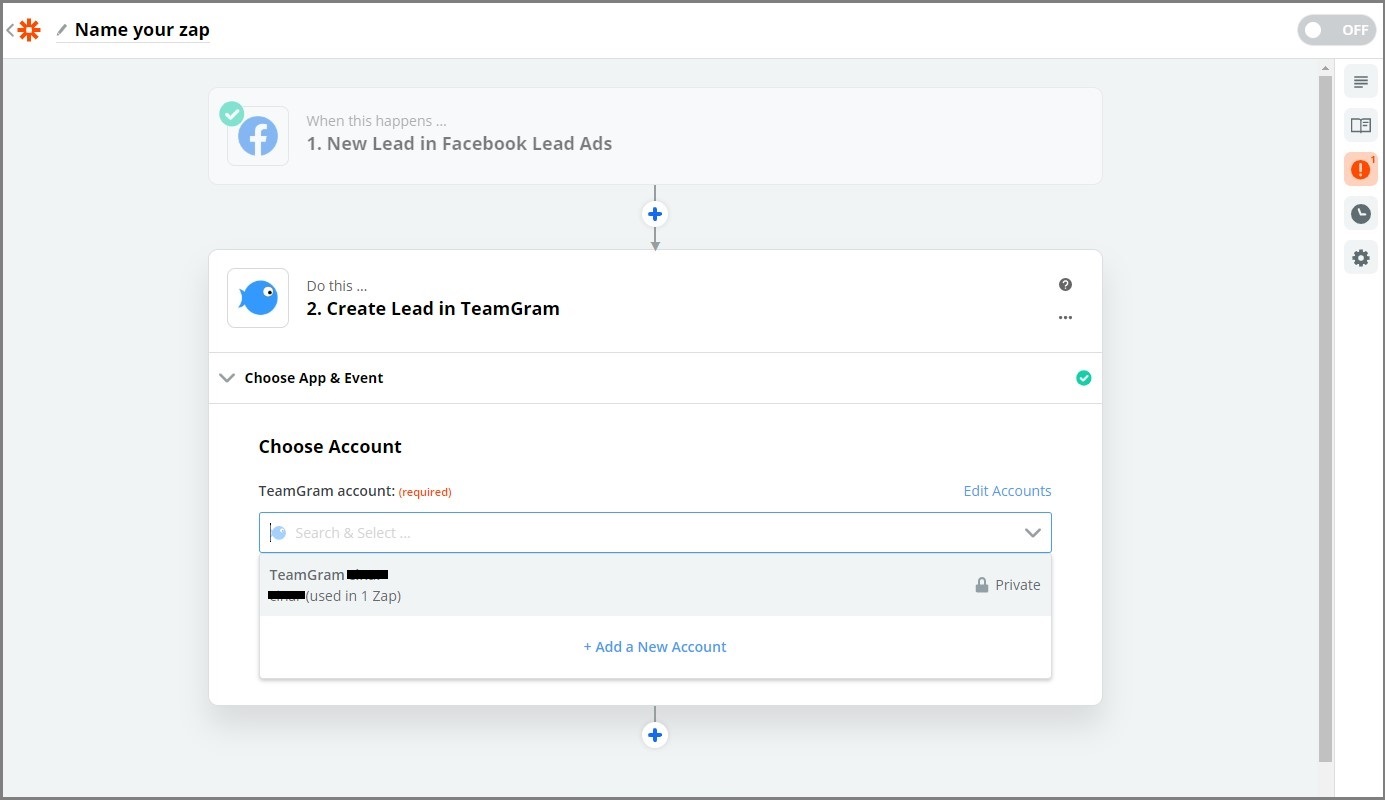
Some fields are required. Other fields are optional but filling them is still important. After making your selections, click “Continue”
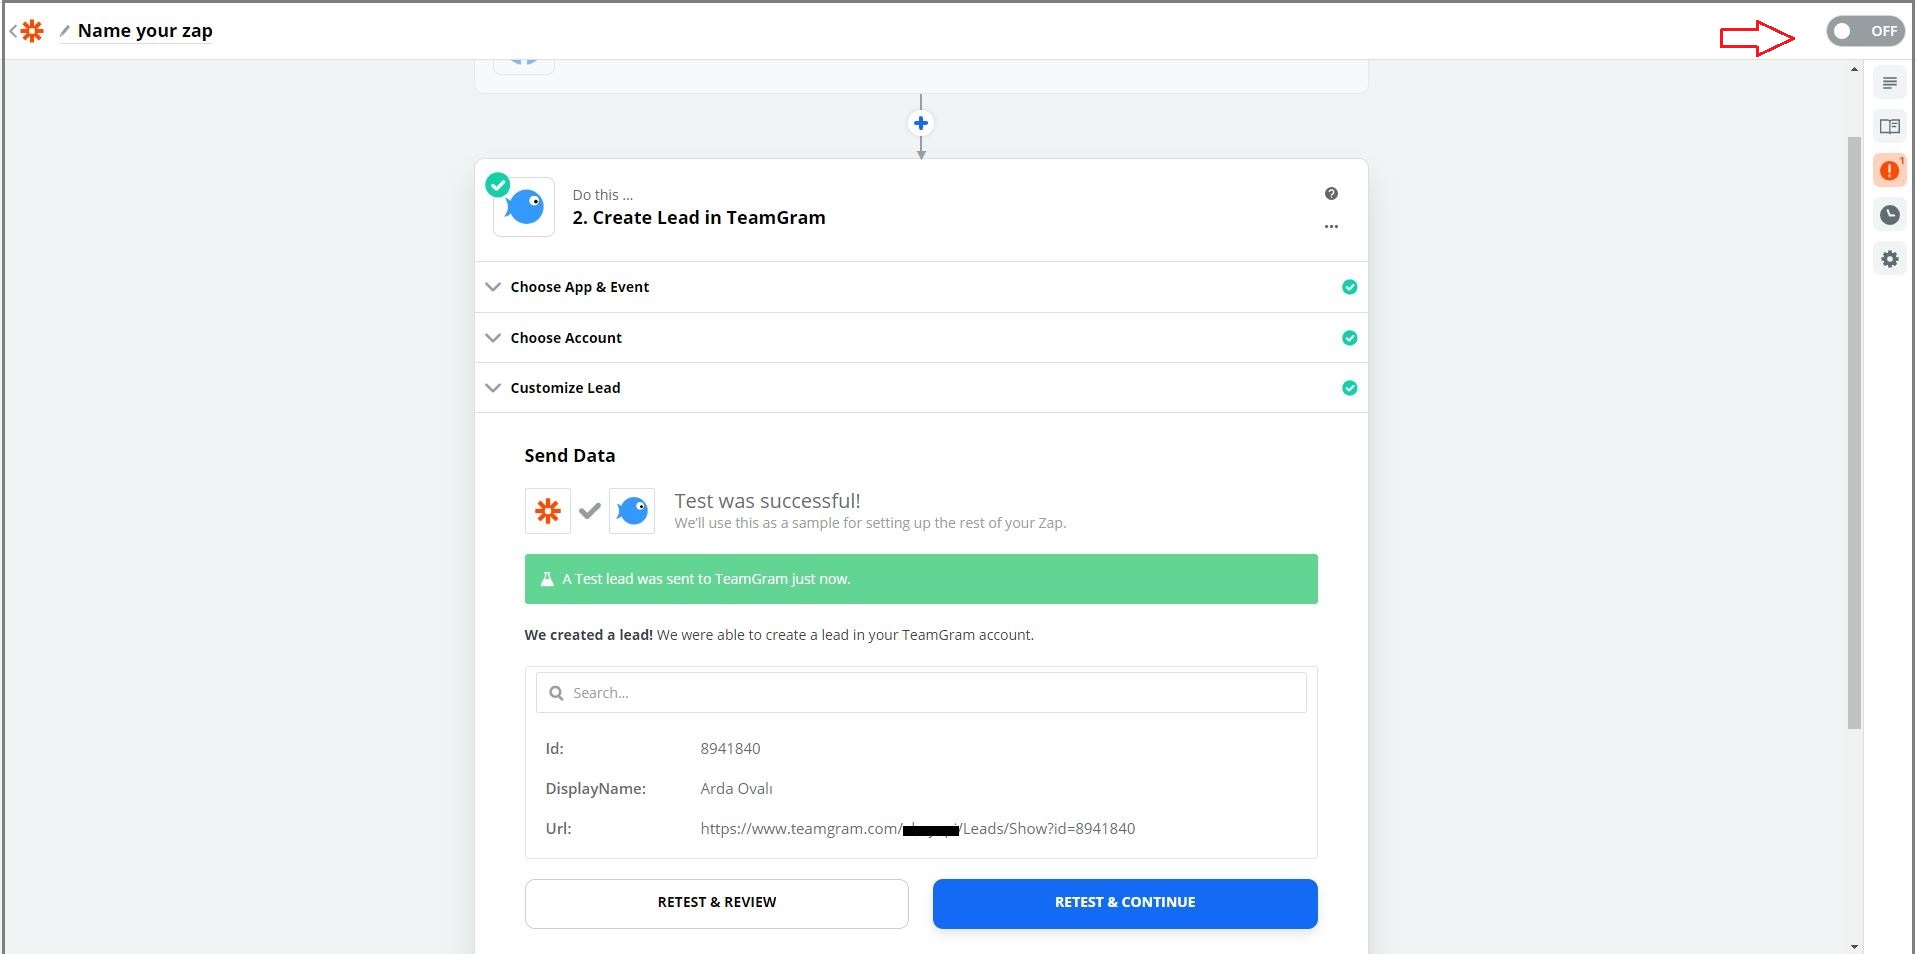
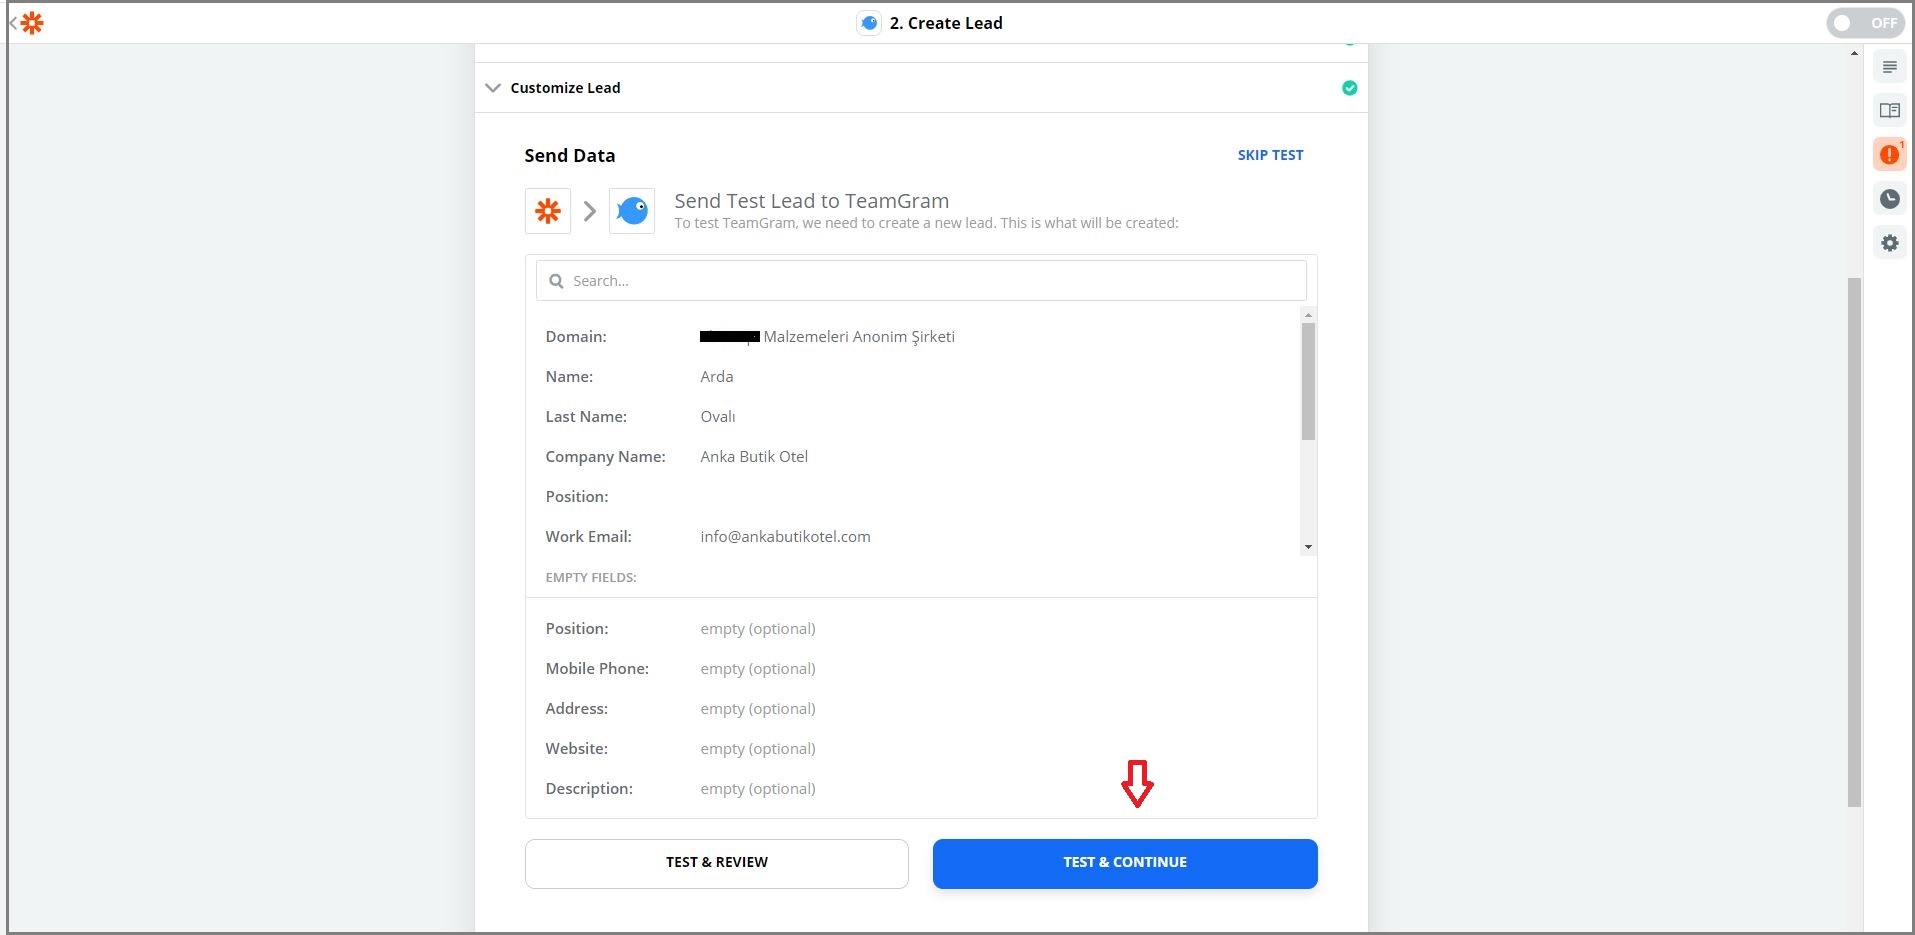
You need to test to make sure that Zap works. In this step, you will see what information will be used from the application for the trigger. Click on the “Test & Continue” button to make sure the trigger is working. Wait for the success message before proceeding to the next step.
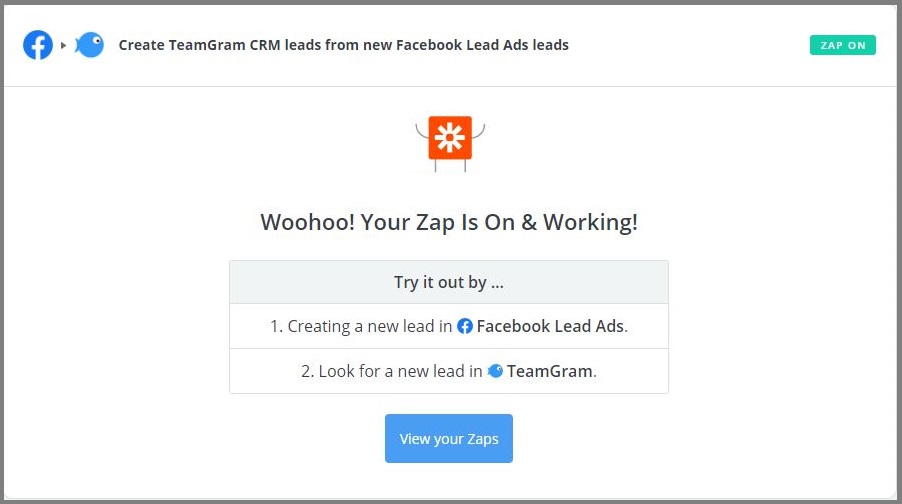
After your test is successful, the screen will pop-up “Zap is ready – Now turn it on!”. Now you can go and turn the toggle switch on in the upper right corner.